What is the Genshin Impact Spiral Abyss? Located in Mondstadt in the Musk Reef, the Spiral Abyss is a special domain that consists of two main parts: the Abyss Corridor and the Abyssal Moon Spire. Fighting through the many floors of this domain will reward you with really useful items like Primogems, levelling materials, and Mora.
Below you'll find all the information in our Spiral Abyss guide, and we'll be sure to keep this page updated with any upcoming changes!
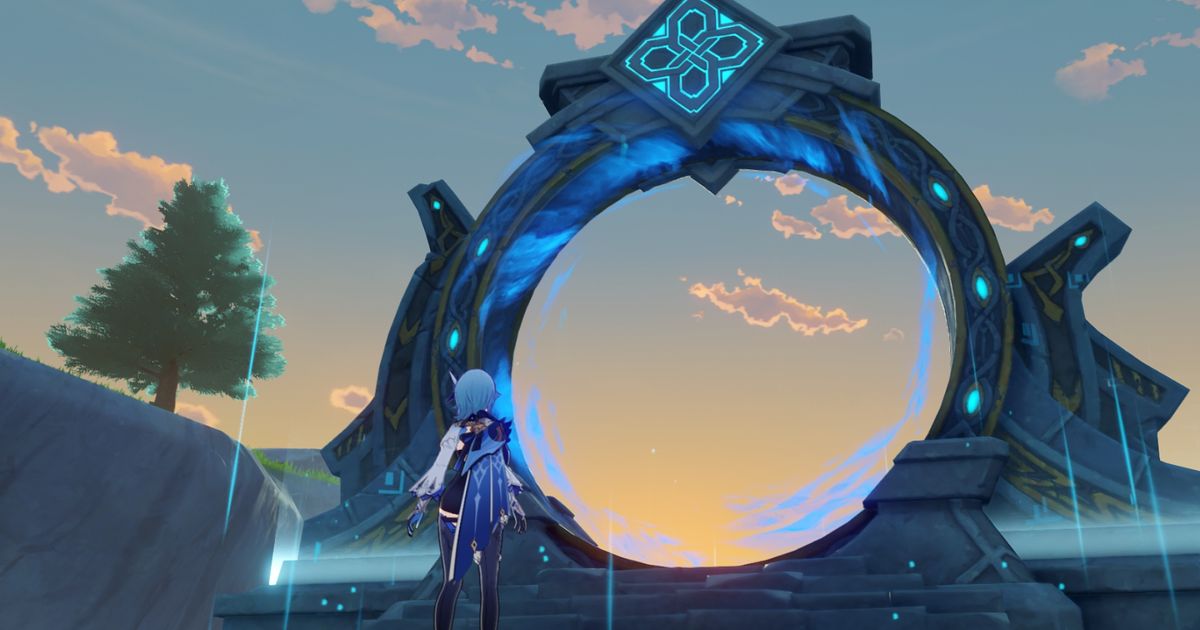
How Do I Get to the Genshin Impact Spiral Abyss?
You can unlock the Spiral Abyss at Adventure Rank 20 and access it through the wormhole in the sky at the edge of Cape Oath. Other than that, there’s no special requirement, with the floors separated only by different levels of difficulty.
The Spiral Abyss is divided into 12 floors, with each one containing 3 chambers. For Floors 1-4, each chamber must be cleared in five minutes, which changes to ten minutes from Floor 5 onwards. Starting at Floor 5, the Spiral Abyss will also separate into two paths, which will require you to set up two separate teams of four characters to fulfil the floor challenge. You can’t use the same character in both teams, and the second half of the chamber starts with the time remaining from the first half.

 click to enlarge
 + 4
+ 4What Are the Genshin Impact Abyss Corridor and Abyssal Moon Spire?
The Spiral Abyss is composed of two parts: the 'Abyss Corridor' and the 'Abyssal Moon Spire'. Clearing all eight floors of the Abyss Corridor will unlock the Abyssal Moon Spire. While in the Abyss Corridor, all enemies are at the same level, while in the Abyssal Moon Spire, they gradually increase their level.
The Abyssal Moon Spire resets twice a month on the first and sixteenth day of the month, which will cause a new period of Blessing of the Abyssal Moon to begin and also reset its rewards. However, the rewards found in the Abyss Corridor won’t reset.
What Are the Genshin Impact Spiral Abyss Combat Bonuses and Restrictions?
There are several restrictions while you fight through the Spiral Abyss. When challenging each floor, you cannot:
- Consume food
- Change party members
- Change artifacts or weapons
- Level up or ascend characters
 click to enlarge + 4
What Are the Benedictions Of the Abyss and Ley Line Disorders?
Benedictions of the Abyss are buffs that assist you in battle. At the start of each chamber, you can choose to receive one of them, and choosing the right one according to your party composition becomes pivotal, as it’ll make the challenges easier to complete. Different benedictions have different effects and durations:
- Effective this floor: Effect lasts until entering the next floor.
- Effective this chamber: Effect lasts until entering the next chamber.
- Effective immediately: Effect starts immediately.
Benedictions of the Abyss List
| Benediction | Duration |
|---|---|
| Character ATK +20% | Floor |
| Character All Elemental RES +25% | Chamber |
| Character Anemo RES +35% | Chamber |
| Character CRIT Rate +8%, CRIT DMG +15% | Floor |
| Character Charged Attack Stamina Consumption -50% | Chamber |
| Character Cryo RES +35% | Chamber |
| Character DEF +30% | Floor |
| Character DEF -15%, ATK +40% | Chamber |
| Character DMG within 8s of sprint +20%. Can occur only once every 15s. | Floor |
| Character Dendro RES +35% | Chamber |
| Character Electro RES +35% | Chamber |
| Character Elemental Burst DMG +20% | Floor |
| Character Elemental Bursts instantly restore 30% HP | Chamber |
| Character Elemental Mastery +80 | Floor |
| Character Elemental Skill DMG +20% | Floor |
| Character Elemental Skill and Burst CD -20% | Chamber |
| Character Energy Recharge +20% | Floor |
| Character Geo RES +35% | Chamber |
| Character Healing Effectiveness is increased by 20%. | Floor |
| Character Hydro RES +35% | Chamber |
| Character Max HP +25% | Floor |
| Character Movement SPD +30% | Chamber |
| Character Normal Attack SPD +25% | Chamber |
| Character Normal and Charged Attack DMG +20% | Floor |
| Character Physical DMG +25% | Floor |
| Character Physical DMG RES +30% | Chamber |
| Character Pyro RES +35% | Chamber |
| Character Sprinting Stamina cost -30% | Chamber |
| Defeating an opponent gives a 50% chance to end current Elemental Skill CD. Can only occur once every 20s. | Chamber |
| Defeating an opponent instantly restores 8% HP for the current character. | Chamber |
| Increases Character DMG dealt to opponents' weak points by 30%. | Floor |
| Instantly restores 25% HP to all party members. | Immediate |
| When Character HP is greater than 50%, ATK +30% | Chamber |
| When Character HP is greater than 50%, DEF +40% | Chamber |
| When Character HP is less than 50%, ATK +60% | Chamber |
| When Character HP is less than 50%, DEF +80% | Chamber |
- Read More: Genshin Impact Sakura Bloom Locations
In addition, each floor in the Spiral Abyss has a different Ley Line Disorder, a passive effect that can give buffs or debuffs to characters, enemies, or both. Ley Line Disorders can be Hazards, Elemental Debuffs, or Buffs of varied nature, and you should pay attention to them since they can turn the tide in your favour or become really annoying obstacles.
Ley Line Disorder List
Hazards
| Name | Effect |
|---|---|
| Sheer Cold | After your character's temperature bar fills up with ice, you will lose HP per second until you are warmed up again by designated heat source. |
| Lightning Bolts | Lightning bolts will periodically fall from above, dealing Electro Damage and completely draining the hit character's Energy. Lightning bolts may leave balls of lightning. |
| Powerful Blast | When Overloaded/Superconduct/Electro-Charged/Melt/Vaporize is triggered, you will be hit by a powerful blast, causing your character to take damage. |
| Icicles | Icicles will periodically fall from above, dealing Cryo Damage. |
| Frozen Duration Increase | The duration of the Frozen status effect is greatly increased. |
| High-Energy Crystal Cores | Defeated opponents will drop unstable High-Energy Crystal Cores that will explode when characters get close to them, dealing Geo Damage to nearby characters. |
| Plasma Field | A Plasma Field will be generated at the edge of the challenge area once the challenge begins. While within the field, characters will be hit by a lightning strike once every 2 seconds and take Electro Damage. The area covered by the field will gradually expand as the challenge proceeds. |
| Chaos Cluster | A Chaos Cluster will chase characters around once the challenge begins. When the Chaos Cluster touches a character or opponents, it will deal immense damage to them. If it touches a character, it will disappear. The size and damage dealt by these clusters will gradually bleed away and grow smaller, but its speed will also gradually increase. |
| Attendants | When the Frostarm Lawachurl's HP has dropped to a certain point, opponents known as Attendants will appear and grant it several bonuses. Each Attendant will increase the Frostarm Lawachurl's Elemental Resistance and Physical Resistance by 10%. The Attendants will also heal it every 12 seconds for 5% of its HP. The Abyss Herald: Wicked Torrents has attendants to defend it. A new set of Attendants will be summoned at fixed intervals, replacing the previous group, and these Attendants will enhance the Abyss Herald's abilities. Each Attendant increases its Elemental Resistance and Physical Resistance by 10%. The Attendants will also heal it every 12 seconds for 5% of its HP per Attendant. When there are no Attendants on the field, the Abyss Herald: Wicked Torrents will lose the aforementioned enhancements and healing abilities. All Attendants will be destroyed when the Abyss Herald: Wicked Torrents enters the Dark Descent state due to taking damage, and they will not be summoned again. |
Elemental Debuffs
| Name | Effect |
|---|---|
| Smoldering Flames | Your character will be periodically inflicted with Smoldering Flames, causing you to take Pyro DMG until the inflicted Pyro element is removed. |
| Slowing Water | Your character will be periodically inflicted with Slowing Water, greatly increasing your skills' cooldown duration until the inflicted Hydro element is removed. |
| Engulfing Storm | Your character will be periodically inflicted with Engulfing Storm, continuously draining your Energy until the inflicted Electro element is removed. |
| Condensed Ice | Your character will be periodically inflicted with Condensed Ice, greatly increasing your Stamina Consumption until the inflicted Cryo element is removed. |
Buffs
| Name | Effect |
|---|---|
| Elemental Damage Buff | Elemental Damage dealt by all party members increased by 75% |
| Energy Blast | When Overloaded/Melt/Vaporize/Electro-Charged/Superconduct is triggered, an Energy Blast will occur, dealing damage to surrounding enemies. |
| Electro-Charged Buff | Electro-Charged Damage increased by 150%, and its AoE is increased by 100%. |
| Overloaded Buff | Overloaded Damage increased by 200%. |
| Swirl Buff | Increases Swirl reaction Damage by 300%, and its AoE by 100%. |
| Superconduct Buff | Superconduct Damage increased by 300% and decreases the target's Physical Resistance by an additional 20%. |
| HP Conditional Buff | When your character's HP is greater than 50%, Attack and Defense are increased by 25%. When HP is greater than 80%, Normal Attack Speed is increased by 20%. When HP is greater than 80%, Movement Speed is increased by 20%. When HP is greater than 95%, Critical Rate is increased by 10% and Critical Damage is increased by 20%. When HP is less than 60%, Attack is increased by 50% and Defense is increased by 50%. When HP is less than 45%, Normal Attack Speed is increased by 30%. When HP is less than 45%, Movement Speed is increased by 30%. When HP is less than 30%, Critical Rate is increased by 20% and Critical Damage is increased by 40%. When active character's HP is greater than 90%, Damage dealt is increased by 50%. When an active character regenerates HP, they will regenerate 3 Energy for all characters in your own party. This effect can be triggered once every 1.5 seconds. |
| Action Conditional Buff | Using an Elemental Burst increases all party members' Attack and Defense by 6%. Max 10 stacks. At 5 stacks and above, increases character Normal Attack Speed and Movement Speed by an additional 30%. |
| Critical Elemental Particle Generation | Critical hits will generate Elemental Particles and Orbs. Can only occur once every 15 seconds. |
| Critical Damage Buff | Critical Damage dealt by all party members increased by 120%. |
| Backlash | A backlash will occur when opponents hit a character protected by a shield, unleashing a shockwave originating at the attacking opponent's position that deals one instance of AoE Damage. Can occur once every 2 seconds. |
| Plunging Attack Buff | When Plunging Attacks hit opponents, each opponent hit will increase the Attack of all characters in your own party by 6% for 30 seconds. A maximum of 60% Attack can be gained this way. All party members' Plunging Attacks Damage increased by 120%. |
| Melee Buff | If the character wields a Sword, Claymore, or Polearm, Normal and Charged Attacks deal 75% increased Damage. If the character wields a Sword, Claymore, or Polearm, Normal and Charged Attacks will unleash shockwaves when they hit opponents, dealing AoE Damage. These shockwaves can be triggered in this manner every 2 seconds. |
| Ranged Buff | When there are no opponents around your current character, the Damage dealt by all characters in your party is increased by 75%. When there are no opponents around your current character, Movement Speed is increased by 20%, and Sprinting and Alternative Sprint Stamina consumption is decreased by 50%. |
| Shield Buff | While protected by a shield, the Damage dealt by characters is increased by 50%. When a character obtains an Elemental Shard created from a Geo Reaction they will unleash a shockwave that deals Damage to opponents in an AoE. A shockwave can be triggered once every second. |
| Elemental Mastery Buff | Elemental Mastery Buff All party members' Elemental Mastery is increased by 300. When a character triggers an Elemental Reaction on a nearby opponent, it will trigger a shockwave at that opponent's position that deals Damage. A shockwave can be triggered in this manner every second. |
What Is the Blessing of the Abyssal Moon?
The Blessing of the Abyssal Moon is a passive effect that works across the entirety of the Spiral Abyss. This effect changes every first and sixteenth day of each month and provides a range of buffs. We will update you with any upcoming blessing as soon as it releases!
Current Blessing of the Abyssal Moon
| Name | Effect | Start Date | End Date |
|---|---|---|---|
| Blessing of the Renewing Moon | After a character uses an Elemental Burst, all party members' ATK is increased by 6.5% for 15s. Maximum 7 stacks. When 7 stacks are reached, the active character's Normal Attacks will unleash a shockwave at the position of the opponent it hits, dealing AoE DMG. A shockwave can be unleashed in this manner once every 2s. | 2021-09-16 | 2021-10-01 |
 click to enlarge + 4
List of Genshin Impact Spiral Abyss Floors
Every Floor in the Spiral Abyss makes you face several enemies while also presenting a challenge for you to fulfil if you want to ace it with the maximum amount of Abyss Stars. While the Abyss Corridor Floors always feature the same enemies, the Abyssal Moon Spire changes every two weeks.
Abyss Corridor Floor List
| Floor-Chamber | Enemy Level | Challenge | Ley Line Disorder | Enemy List |
|---|---|---|---|---|
| 1-1 | 25 | Remaining challenge time longer than 90/150/210 sec. | Pyro DMG dealt by all party members increased by 75%. Overloaded DMG increased by 200%. | Electro Slime x17, Large Electro Slime x1, Mutant Electro Slime x4 |
| 1-2 | 25 | Remaining challenge time longer than 90/150/210 sec. | Pyro DMG dealt by all party members increased by 75%. Overloaded DMG increased by 200%. | Hilichurl Fighter x6, Wooden Shield Hilichurl Guard x9, Hilichurl Shooter x2, Pyro Hilichurl Grenadier x2, Wooden Shield Mitachurl x1, Blazing Axe Mitachurl x1 |
| 1-3 | 25 | Remaining challenge time longer than 90/150/210 sec. | Pyro DMG dealt by all party members increased by 75%. Overloaded DMG increased by 200%. | Hilichurl Shooter x2, Wooden Shield Mitachurl x1, Large Electro Slime x1, Mutant Electro Slime x1, Fatui Electro Cicin Mage x1 |
| 2-1 | 40 | Remaining challenge time longer than 60/90/180 sec. | Cryo Damage dealt by all party members increased by 75%. The duration of the Frozen status effect is greatly increased. | Electro Slime x5, Large Electro Slime x5, Mutant Electro Slime x4 |
| 2-2 | 40 | Target defense process greater than 20/40/60%. | Cryo Damage dealt by all party members increased by 75%. The duration of the Frozen status effect is greatly increased. | Hydro Slime x2, Large Hydro Slime x8, Blazing Axe Mitachurl x1, Hydro Abyss Mage x1 |
| 2-3 | 40 | Remaining challenge time longer than 60/90/180 sec. | Cryo Damage dealt by all party members increased by 75%. The duration of the Frozen status effect is greatly increased. | Hydro Samachurl x2, Blazing Axe Mitachurl x1, Hydro Abyss Mage x2 |
| 3-1 | 45 | Remaining challenge time longer than 60/90/180 sec. | Increases Swirl reaction Damage by 300%, and its AoE by 100%. Anemo Damage dealt by all party members increased by 75%. | Cryo Slime x5, Large Cryo Slime x1, Pyro Slime x5, Large Pyro Slime x1, Large Electro Slime x1, Cryo Hilichurl Shooter x2, Pyro Hilichurl Shooter x2, Wooden Shield Hilichurl Guard x6 |
| 3-2 | 45 | Remaining challenge time longer than 60/90/180 sec. | Increases Swirl reaction Damage by 300%, and its AoE by 100%. Anemo Damage dealt by all party members increased by 75%. | Treasure Hoarder Pyro Potioneer x4, Treasure Hoarder Hydro Potioneer x2, Treasure Hoarder Electro Potioneer x6, Treasure Hoarder Cryo Potioneer x2, Treasure Hoarder Crusher x1, Treasure Hoarder Gravedigger x1, Treasure Hoarder Pugilist x1 |
| 3-3 | 45 | Remaining challenge time longer than 60/90/180 sec. | Increases Swirl reaction Damage by 300%, and its AoE by 100%. Anemo Damage dealt by all party members increased by 75%. | Blazing Axe Mitachurlx1, Ruin Guard 1 |
| 4-1 | 50 | Remaining challenge time longer than 60/120/180 sec. | Electro Damage dealt by all party members increased by 75%. Electro-Charged Damage increased by 150%, and its AoE is increased by 100%. | Hydro Slime x4, Large Hydro Slime x7, Hilichurl Fighter x8, Cryo Hilichurl Shooter x2, Hydro Abyss Mage x2 |
| 4-2 | 50 | Target defense process greater than 20/40/60%. | Electro Damage dealt by all party members increased by 75%. Electro-Charged Damage increased by 150%, and its AoE is increased by 100%. | Hydro Slime x10, Hilichurl Fighter x4, Cryo Hilichurl Shooter x2, Hilichurl Berserker x3, Blazing Axe Mitachurl x1, Hydro Abyss Mage x2 |
| 4-3 | 50 | Remaining challenge time longer than 60/120/180 sec. | Electro Damage dealt by all party members increased by 75%. Electro-Charged Damage increased by 150%, and its AoE is increased by 100%. | Hilichurl Fighter x2, Cryo Hilichurl Shooter x1, Hydro Samachurl x1, Blazing Axe Mitachurl x1, Hydro Abyss Mage x2 |
| 5-1 | 55 | Remaining challenge time longer than 180/300/420 sec. | When your character's HP is greater than 50%, Attack and Defense are increased by 25%. When HP is greater than 80%, Normal Attack Speed is increased by 20%. When HP is greater than 80%, Movement Speed is increased by 20%. When HP is greater than 95%, Critical Rate is increased by 10% and Critical Damage is increased by 20%. | First Half: Cryo Slime x5, Large Cryo Slime x12, Electro Hilichurl Shooter x3. Second Half: Pyro Abyss Mage x2. |
| 5-2 | 55 | Remaining challenge time longer than 90/180/240 sec. | When your character's HP is greater than 50%, Attack and Defense are increased by 25%. When HP is greater than 80%, Normal Attack Speed is increased by 20%. When HP is greater than 80%, Movement Speed is increased by 20%. When HP is greater than 95%, Critical Rate is increased by 10% and Critical Damage is increased by 20%. | First Half: Treasure Hoarder Gravedigger x1, Treasure Hoarder Seaman x2, Treasure Hoarder Handyman x4, Treasure Hoarder Cryo Potioneer x2, Treasure Hoarder Marksman x4. Second Half: Treasure Hoarder Crusher x2, Treasure Hoarder Pugilist x4, Treasure Hoarder Seaman x1, Treasure Hoarder Pyro Potioneer x2, Treasure Hoarder Scout x4. |
| 5-3 | 55 | Remaining challenge time longer than 180/300/420 sec. | When your character's HP is greater than 50%, Attack and Defense are increased by 25%. When HP is greater than 80%, Normal Attack Speed is increased by 20%. When HP is greater than 80%, Movement Speed is increased by 20%. When HP is greater than 95%, Critical Rate is increased by 10% and Critical Damage is increased by 20%. | First Half: Fatui Electro Cicin Mage x1, Treasure Hoarder Handyman x2. Second Half: Fatui Pyro Agent x1, Treasure Hoarder Electro Potioneer x2. |
| 6-1 | 60 | Remaining challenge time longer than 30/60/120 sec. | Using an Elemental Burst increases all party members' ATK and DEF by 6%. Max 10 stacks. At 5 stacks and above, increases character Normal Attack SPD and Movement SPD by an additional 30%. | First Half: Cryo Slime x4, Large Cryo Slime x1, Cryo Whopperflower x5, Electro Hilichurl Shooter x3, Hilichurl Fighter x4. Second Half: Pyro Slime x4, Large Pyro Slime x1, Pyro Whopperflower x5, Anemo Samachurl x2, Cryo Hilichurl Shooter x2, Hilichurl Fighter x2. |
| 6-2 | 60 | Remaining challenge time longer than 90/180/270 sec. | Using an Elemental Burst increases all party members' ATK and DEF by 6%. Max 10 stacks. At 5 stacks and above, increases character Normal Attack SPD and Movement SPD by an additional 30%. | First Half: Rock Shield Hilichurl Guard x1, Wooden Shield Hilichurl Guard x2, Pyro Hilichurl Grenadier x4, Hilichurl Berserker x2, Electro Hilichurl Shooter x3, Hydro Samachurl x2, Wooden Shield Mitachurl x2, Blazing Axe Mitachurl x3, Rock Shieldwall Mitachurl x1, Cryo Abyss Mage x1. Second Half: Pyro Slime x10, Large Pyro Slime x5, Pyro Hilichurl Shooter x1, Cryo Hilichurl Shooter x1, Electro Hilichurl Shooter x5, Dendro Samachurl x2, Anemo Samachurl x3. |
| 6-3 | 60 | Remaining challenge time longer than 120/240/330 sec. | Using an Elemental Burst increases all party members' ATK and DEF by 6%. Max 10 stacks. At 5 stacks and above, increases character Normal Attack SPD and Movement SPD by an additional 30%. | First Half: Rock Shield Hilichurl Guard x2, Cryo Hilichurl Shooter x2, Geo Samachurl x1, Stonehide Lawachurl x1. Second Half: Large Pyro Slime x6, Pyro Abyss Mage x3. |
| 7-1 | 65 | Remaining challenge time longer than 120/300/420 sec. | Critical hits will generate Elemental Particles and Orbs. Can only occur once every 15 seconds. Critical Damage dealt by all party members increased by 120%. | First Half: Fatui Cryogunner Legionnaire x2, Fatui Hydrogunner Legionnaire x2, Fatui Electrohammer Vanguard x1. Second Half: Fatui Cryogunner Legionnaire x2, Fatui Pyroslinger Bracer x2, Fatui Anemoboxer Vanguard x1. |
| 7-2 | 65 | Remaining challenge time longer than 120/300/390 sec. | Critical hits will generate Elemental Particles and Orbs. Can only occur once every 15 seconds. Critical Damage dealt by all party members increased by 120%. | First Half: Fatui Cryogunner Legionnaire x2, Fatui Geochanter Bracer x2, Fatui Electrohammer Vanguard x1. Second Half: Fatui Geochanter Bracer x2, Fatui Pyroslinger Bracer x2, Fatui Anemoboxer Vanguard x1. |
| 7-3 | 65 | Remaining challenge time longer than 120/330/450 sec. | Critical hits will generate Elemental Particles and Orbs. Can only occur once every 15 seconds. Critical Damage dealt by all party members increased by 120%. | First Half: Fatui Hydrogunner Legionnaire x1, Fatui Electrohammer Vanguard x1, Fatui Anemoboxer Vanguard x1. Second Half: Fatui Pyroslinger Bracer x1, Fatui Electrohammer Vanguard x1, Fatui Anemoboxer Vanguard x1. |
| 8-1 | 70 | Remaining challenge time longer than 180/330/420 sec. | When HP is less than 60%, ATK is increased by 50% and DEF is increased by 50%. When HP is less than 45%, Normal Attack SPD is increased by 30%. When HP is less than 45%, Movement SPD is increased by 30%. When HP is less than 30%, CRIT Rate is increased by 20% and CRIT DMG is increased by 40%. | First Half: Hydro Abyss Mage x1, Cryo Abyss Mage x1. Second Half: Pyro Abyss Mage x2. |
| 8-2 | 70 | Remaining challenge time longer than 180/300/360 sec. | When HP is less than 60%, ATK is increased by 50% and DEF is increased by 50%. When HP is less than 45%, Normal Attack SPD is increased by 30%. When HP is less than 45%, Movement SPD is increased by 30%. When HP is less than 30%, CRIT Rate is increased by 20% and CRIT DMG is increased by 40%. | First Half: Hilichurl Fighter x1, Hilichurl Shooter x2, Wooden Shield Hilichurl Guard x1, Cryo Hilichurl Shooter x2, Ruin Guard x1. Second Half: Pyro Hilichurl Shooter x2, Hilichurl Berserker x3, Pyro Hilichurl Grenadier x2, Ruin Guard x1. |
| 8-3 | 70 | Remaining challenge time longer than 60/120/180 sec. | When HP is less than 60%, ATK is increased by 50% and DEF is increased by 50%. When HP is less than 45%, Normal Attack SPD is increased by 30%. When HP is less than 45%, Movement SPD is increased by 30%. When HP is less than 30%, CRIT Rate is increased by 20% and CRIT DMG is increased by 40%. | First Half: Cryo Regisvine x1. Second Half: Pyro Regisvine x1. |
Abyssal Moon Spire Floor List (September 1, 2021 - September 16, 2021)
| Floor-Chamber | Enemy Level | Challenge | Ley Line Disorder | Enemies |
|---|---|---|---|---|
| 9-1 | 72 | Remaining challenge time longer than 60/180/300 sec. | A plasma field will be generated at the edge of the challenge arena once the challenge begins. Characters outside the safe zone will take Electro damage every 5 seconds they are in the plasma field. The safe zone gradually shrinks in size as additional reinforcements appear. | First Half: Wooden Shieldwall Mitachurl x1, Anemo Samachurl x1, Hydro Samachurl x1, Electro Hilichurl Shooter x2, Cryo Hilichurl Shooter x2, Large Hydro Slime x8 Second Half: Hydro Abyss Mage x1, Crackling Axe Mitachurlx1, Blazing Axe Mitachurlx1, Electro Samachurl x2 |
| 9-2 | 74 | Remaining challenge time longer than 60/180/300 sec. | A plasma field will be generated at the edge of the challenge arena once the challenge begins. Characters outside the safe zone will take Electro damage every 5 seconds they are in the plasma field. The safe zone gradually shrinks in size as additional reinforcements appear. | First Half: Fatui Cryogunner Legionnaire x2, Fatui Hydrogunner Legionnaire x1, Fatui Electrohammer Vanguard x1, Fatui Geochanter Bracer x1, Fatui Anemoboxer Vanguard x1 Second Half: Treasure Hoarder Handyman x1, Treasure Hoarder Gravedigger x1, Treasure Hoarder Seaman x1, Treasure Hoarder Pugilist x3, Treasure Hoarder Crusher x3, Treasure Hoarder Pyro Potioneer x1, Treasure Hoarder Hydro Potioneer x1, Treasure Hoarder Electro Potioneer x1, Treasure Hoarder Cryo Potioneer x1, Treasure Hoarder Marksman x2 |
| 9-3 | 76 | Remaining challenge time longer than 180/300/420 sec. | A plasma field will be generated at the edge of the challenge arena once the challenge begins. Characters outside the safe zone will take Electro damage every 5 seconds they are in the plasma field. The safe zone gradually shrinks in size as additional reinforcements appear. | First Half: Frostarm Lawachurl x1, Stonehide Lawachurl x1 Second Half: Fatui Pyro Agent x2, Fatui Electro Cicin Mage x2 |
| 10-1 | 80 | Remaining challenge time longer than 60/180/300 sec. | One of the enemies is designated as a "Leader", who is accompanied by several "Attendants". Each attendant provides the leader with 10% resistance to both elemental and physical damage. Every 12 seconds, the leader will heal for 5% health for every attendant on the field. | First Half: Electro Abyss Mage x1, Dendro Samachurl x1, Anemo Samachurl x1, Hydro Samachurl x1, Blazing Axe Mitachurl x1, Pyro Hilichurl Shooter x2, Cryo Hilichurl Shooter x2, Electro Hilichurl Shooter x2 Second Half: Stonehide Lawachurl x1, Pyro Hilichurl Shooter x2, Cryo Hilichurl Shooter x2 |
| 10-2 | 82 | Remaining challenge time longer than 60/180/300 sec. | One of the enemies is designated as a "Leader", who is accompanied by several "Attendants". Each attendant provides the leader with 10% resistance to both elemental and physical damage. Every 12 seconds, the leader will heal for 5% health for every attendant on the field. | First Half: Fatui Pyro Agent x1, Fatui Cryogunner Legionnaire x1, Fatui Hydrogunner Legionnaire x1, Fatui Anemoboxer Vanguard x1 Second Half: Fatui Electro Cicin Mage x1, Fatui Pyroslinger Bracer x1, Fatui Electrohammer Vanguard x1, Fatui Geochanter Bracer x1 |
| 10-3 | 85 | Remaining challenge time longer than 180/300/420 sec. | One of the enemies is designated as a "Leader", who is accompanied by several "Attendants". Each attendant provides the leader with 10% resistance to both elemental and physical damage. Every 12 seconds, the leader will heal for 5% health for every attendant on the field. | First Half: Abyss Lector: Violet Lightning x1, Anemo Samachurl x1, Hydro Samachurl x1 Second Half: Abyss Herald: Wicked Torrents x1, Electro Samachurl x2 |
| 11-1 | 88 | Remaining challenge time longer than 60/180/300 sec. | Pyro and Cryo damage dealt by members is increased 60%. | First Half: Crackling Axe Mitachurl x2, Blazing Axe Mitachurl x1, Electro Whopperflower x6, Large Electro Slime x2, Mutant Electro Slime x2, Large Hydro Slime x4 Second Half Thunderhelm Lawachurl x1, Electro Abyss Mage x1 |
| 11-2 | 90 | Remaining challenge time longer than 60/180/300 sec. | Pyro and Cryo damage dealt by members is increased 60%. | First Half: Frostarm Lawachurl x1, Cryo Abyss Mage x1, Hydro Abyss Mage x1 Second Half: Abyss Lector: Violet Lightning x1, Electro Abyss Mage x1, Pyro Abyss Mage x1 |
| 11-3 | 92 | Remaining challenge time longer than 180/300/420 sec. | Pyro and Cryo damage dealt by members is increased 60%. | First Half: Kairagi: Dancing Thunder x1, Kairagi: Fiery Might x1, Nobushi: Jintouban x1, Nobushi: Hitsukeban x1, Nobushi: Kikouban Second Half: Fatui Mirror Maiden x1, Fatui Pyro Agent x2, Fatui Electro Cicin Mage x1 |
| 12-1 | 95 | Remaining challenge time longer than 180/300/420 sec. | Energy Tides are present in this challenge. They switch between high and low cycle every 10 seconds. During high cycle, a large amount of elemental projectiles will appear when a character hits the enemy, restoring 10 energy. This occurs every 2.8 seconds. During low cycle, party members cannot obtain elemental energy. | First Half: Kairagi: Dancing Thunder x1, Kairagi: Fiery Might x1, Nobushi: Jintouban x1, Nobushi: Hitsukeban x1, Nobushi: Kikouban x1 Second Half: Fatui Mirror Maiden x1, Fatui Pyro Agent x2, Fatui Electro Cicin Mage x1 |
| 12-2 | 98 | Remaining challenge time longer than 180/300/420 sec. | Energy Tides are present in this challenge. They switch between high and low cycle every 10 seconds. During high cycle, a large amount of elemental projectiles will appear when a character hits the enemy, restoring 10 energy. This occurs every 2.8 seconds. During low cycle, party members cannot obtain elemental energy. | First Half: Hydro Abyss Mage x1, Thunderhelm Lawachurl x1, Crackling Axe Mitachurl x1, Blazing Axe Mitachurl x1 Second Half: Maguu Kenki x1 |
| 12-3 | 100 | Remaining challenge time longer than 180/300/420 sec. | Energy Tides are present in this challenge. They switch between high and low cycle every 10 seconds. During high cycle, a large amount of elemental projectiles will appear when a character hits the enemy, restoring 10 energy. This occurs every 2.8 seconds. During low cycle, party members cannot obtain elemental energy. | First Half: Ruin Hunter x1, Ruin Cruiser x1, Ruin Defender x1, Ruin Scout x1 Second Half: Ruin Guard x1, Ruin Destroyer x2, Ruin Scout x1 |
 click to enlarge + 4
What Are the Genshin Impact Spiral Abyss Rewards?
The Spiral Abyss gives you rewards for clearing each chamber for the first time, which are called 'Chamber's Bounty', and getting enough Abyssal Stars in each chamber will also reward you with the 'Star's Bounty'. To enter the next Floor in this domain, you need to have earned at least six Abyssal Stars from the previous one, as well as having cleared all three of the previous Floor's chambers.
Abyssal Corridor's rewards can only be collected once, while the Abyssal Moon Spire rewards reset on the first and sixteenth days of the month, during a period called the 'Moment of Syzygy'. It is also during this period that a new Blessing of the Abyssal Moon will begin.
Star's Bounty Rewards
| Number of Stars Obtained | Abyss Corridor - Rewards per Floor | Abyssal Moon Spire - Rewards per Floor |
|---|---|---|
| 3 | 100 Primogems, 15,000 Mora | 50 Primogems, 15,000 Mora |
| 6 | 100 Primogems, 20,000 Mora | 50 Primogems, 20,000 Mora |
| 9 | 100 Primogems, 25,000 Mora | 50 Primogems, 25,000 Mora |
Chamber's Bounty Rewards List
Abyss Corridor
| Floor | Chamber | Bounty |
|---|---|---|
| 1 | 1 | 5,000 Mora, Adventurer's Experience x3, Wanderer's Advice x4, Mystic Enhancement Ore x4, Domain Reliquary - Tier III x1 |
| 1 | 2 | 5,000 Mora, Adventurer's Experience x3, Wanderer's Advice x4, Mystic Enhancement Ore x4, Domain Reliquary - Tier III x1 |
| 1 | 3 | 5,000 Mora, Adventurer's Experience x3, Wanderer's Advice x4, Mystic Enhancement Ore x4, Domain Reliquary - Tier III x1 |
| 2 | 1 | 5,000 Mora, Adventurer's Experience x3, Wanderer's Advice x4, Mystic Enhancement Ore x4, Domain Reliquary - Tier III x1 |
| 2 | 2 | 5,000 Mora, Adventurer's Experience x3, Wanderer's Advice x4, Mystic Enhancement Ore x4, Domain Reliquary - Tier III x1 |
| 2 | 3 | 5,000 Mora, Adventurer's Experience x3, Wanderer's Advice x4, Mystic Enhancement Ore x4, Domain Reliquary - Tier III x1 |
| 3 | 1 | 10,000 Mora, Adventurer's Experience x5, Wanderer's Advice x6, Mystic Enhancement Ore x4, Domain Reliquary - Tier III x1 |
| 3 | 2 | 10,000 Mora, Adventurer's Experience x5, Wanderer's Advice x6, Mystic Enhancement Ore x4, Domain Reliquary - Tier III x1 |
| 3 | 3 | 10,000 Mora, Adventurer's Experience x5, Wanderer's Advice x6, Mystic Enhancement Ore x4, Northlander Polearm Billet x1 |
| 4 | 1 | 10,000 Mora, Adventurer's Experience x5, Wanderer's Advice x6, Mystic Enhancement Ore x4, Domain Reliquary - Tier III x1 |
| 4 | 2 | 10,000 Mora, Adventurer's Experience x5, Wanderer's Advice x6, Mystic Enhancement Ore x4, Domain Reliquary - Tier III x1 |
| 4 | 3 | 10,000 Mora, Adventurer's Experience x5, Wanderer's Advice x6, Mystic Enhancement Ore x4, Domain Reliquary - Tier II x1 |
| 5 | 1 | 15,000 Mora, Adventurer's Experience x6, Wanderer's Advice x8, Mystic Enhancement Ore x5, Domain Reliquary - Tier III x1 |
| 5 | 2 | 15,000 Mora, Adventurer's Experience x6, Wanderer's Advice x8, Mystic Enhancement Ore x5, Domain Reliquary - Tier III x1 |
| 5 | 3 | 15,000 Mora, Adventurer's Experience x6, Wanderer's Advice x8, Mystic Enhancement Ore x5, Domain Reliquary - Tier II x1 |
| 6 | 1 | 15,000 Mora, Adventurer's Experience x6, Wanderer's Advice x8, Mystic Enhancement Ore x5, Domain Reliquary - Tier III x1 |
| 6 | 2 | 15,000 Mora, Adventurer's Experience x6, Wanderer's Advice x8, Mystic Enhancement Ore x5, Domain Reliquary - Tier II x1 |
| 6 | 3 | 15,000 Mora, Adventurer's Experience x6, Wanderer's Advice x8, Mystic Enhancement Ore x5, Domain Reliquary - Tier I x1 |
| 7 | 1 | 20,000 Mora, Adventurer's Experience x7, Wanderer's Advice x10, Mystic Enhancement Ore x5, Domain Reliquary - Tier III x1 |
| 7 | 2 | 20,000 Mora, Adventurer's Experience x7, Wanderer's Advice x10, Mystic Enhancement Ore x5, Domain Reliquary - Tier II x1 |
| 7 | 3 | 20,000 Mora, Adventurer's Experience x7, Wanderer's Advice x10, Mystic Enhancement Ore x5, Domain Reliquary - Tier I x1 |
| 8 | 1 | 20,000 Mora, Adventurer's Experience x7, Wanderer's Advice x10, Mystic Enhancement Ore x5, Domain Reliquary - Tier III x1 |
| 8 | 2 | 20,000 Mora, Adventurer's Experience x7, Wanderer's Advice x10, Mystic Enhancement Ore x5, Domain Reliquary - Tier II x1 |
| 8 | 3 | 20,000 Mora, Adventurer's Experience x7, Wanderer's Advice x10, Mystic Enhancement Ore x5, Domain Reliquary - Tier I x1 |
Abyssal Moon Spire
| Floor | Chamber | Bounty |
|---|---|---|
| 9 | 1 | 20,000 Mora, Hero's Wit x2, Adventurer's Experience x4, Mystic Enhancement Ore x5, Domain Reliquary - Tier II x1 |
| 9 | 2 | 20,000 Mora, Hero's Wit x2, Adventurer's Experience x4, Mystic Enhancement Ore x5, Domain Reliquary - Tier II x1 |
| 9 | 3 | 20,000 Mora, Hero's Wit x2, Adventurer's Experience x4, Mystic Enhancement Ore x5, Domain Reliquary - Tier I x1 |
| 10 | 1 | 25,000 Mora, Hero's Wit x2, Adventurer's Experience x4, Mystic Enhancement Ore x6, Domain Reliquary - Tier II x1 |
| 10 | 2 | 25,000 Mora, Hero's Wit x2, Adventurer's Experience x4, Mystic Enhancement Ore x6, Domain Reliquary - Tier II x1 |
| 10 | 3 | 25,000 Mora, Hero's Wit x2, Adventurer's Experience x4, Mystic Enhancement Ore x6, Domain Reliquary - Tier I x1 |
| 11 | 1 | 40,000 Mora, Hero's Wit x2, Adventurer's Experience x4, Mystic Enhancement Ore x7, Domain Reliquary - Tier II x1 |
| 11 | 2 | 40,000 Mora, Hero's Wit x2, Adventurer's Experience x4, Mystic Enhancement Ore x7, Domain Reliquary - Tier II x1 |
| 11 | 3 | 40,000 Mora, Hero's Wit x2, Adventurer's Experience x4, Mystic Enhancement Ore x7, Domain Reliquary - Tier I x1 |
| 12 | 1 | 40,000 Mora, Hero's Wit x2, Adventurer's Experience x4, Mystic Enhancement Ore x7, Domain Reliquary - Tier II x1 |
| 12 | 2 | 40,000 Mora, Hero's Wit x2, Adventurer's Experience x4, Mystic Enhancement Ore x7, Domain Reliquary - Tier II x1 |
| 12 | 3 | 40,000 Mora, Hero's Wit x2, Adventurer's Experience x4, Mystic Enhancement Ore x7, Domain Reliquary - Tier I x1 |
And that's everything you need to know about the Genshin Impact Spiral Abyss. We've also got plenty of other handy Genshin guides to help you out, including a list of all the Electroculus locations, an Aloy build guide, a comprehensive list of Genshin Impact weapons, and an Ayaka build guide. Check them out!
For more articles like this, take a look at our Genshin Impact , Only Mobile Gaming , and OMG Guides pages.